Showing posts with label Cakes. Show all posts

Sunday, March 1, 2009

Scoop Me Up Some of That


I was so excited when I saw the Daring Bakers Challenge for the month of February. Flourless chocolate cake with homemade vanilla bean ice cream - yum! I've always wanted to make my own ice cream but don't have the want or need to invest in an ice cream maker...I mean really, how much would I use that? I was skeptical that this vanilla bean ice cream would taste like the real thing, but it turned out just amazing! It's definitely not as smooth and creamy you'd want out of an ice cream, but the texture is pretty good and the flavor was spot on.

Paring the vanilla bean ice cream with the flourless chocolate cake was fabulous. The cake was super dense and chocolatey. I made this for our Valentine's Day dessert. Steve whipped up some awesome turkey burgers and garlic french fries, and we timed everything out so that the cake came out of the oven just as we finished eating. It was nice 'n' hot against the ice cream. Love it!

Chocolate Valentino
Sweet Treats by Chef Wan
Preparation Time: 20 minutes
16 ounces (1 pound) (454 grams) of semisweet chocolate, roughly chopped
½ cup (1 stick) plus 2 tablespoons (146 grams total) of unsalted butter
5 large eggs separated

1. Put chocolate and butter in a heatproof bowl and set over a pan of simmering water (the bottom of the bowl should not touch the water) and melt, stirring often.
2. While your chocolate butter mixture is cooling. Butter your pan and line with a parchment circle then butter the parchment.
3. Separate the egg yolks from the egg whites and put into two medium/large bowls.
4. Whip the egg whites in a medium/large grease free bowl until stiff peaks are formed (do not over-whip or the cake will be dry).
5. With the same beater beat the egg yolks together.
6. Add the egg yolks to the cooled chocolate.
7. Fold in 1/3 of the egg whites into the chocolate mixture and follow with remaining 2/3rds. Fold until no white remains without deflating the batter. {link of folding demonstration}
8. Pour batter into prepared pan, the batter should fill the pan 3/4 of the way full, and bake at 375F/190C
9. Bake for 25 minutes until an instant read thermometer reads 140F/60C.
Note – If you do not have an instant read thermometer, the top of the cake will look similar to a brownie and a cake tester will appear wet.
10. Cool cake on a rack for 10 minutes then unmold.

Classic Vanilla Ice Cream

Preparation Time: 30 minutes

Recipe comes from the Ice Cream Book by Joanna Farrow and Sara Lewis (tested modifications and notes in parentheses by Dharm)

Ingredients
1 Vanilla Pod (or substitute with vanilla extract)
300ml / ½ pint / 1 ¼ cups Semi Skimmed Milk – in the U.S. this is 2% fat (or use fresh full fat milk that is pasteurised and homogenised {as opposed to canned or powdered}). Dharm used whole milk.
4 large egg yolks
75g / 3oz / 6 tbsp caster sugar {superfine sugar can be achieved in a food processor or use regular granulated sugar}
5ml / 1 tsp corn flour {cornstarch}
300ml / ½ pint / 1 ¼ cups Double Cream (48% butter fat) {in the U.S. heavy cream is 37% fat)
{you can easily increase your cream's fat content by heating 1/4 cup of heavy cream with 3 Tbs of butter until melted - cool to room temperature and add to the heavy cream as soon as whisk marks appear in the cream, in a slow steady stream, with the mixer on low speed. Raise speed and continue whipping the cream) or use heavy cream the difference will be in the creaminess of the ice cream.

1. Using a small knife slit the vanilla pod lengthways. Pour the milk into a heavy based saucepan, add the vanilla pod and bring to the boil. Remove from heat and leave for 15 minutes to allow the flavours to infuse
Lift the vanilla pod up. Holding it over the pan, scrape the black seeds out of the pod with a small knife so that they fall back into the milk. SET the vanilla pod aside and bring the milk back to the boil.
2. Whisk the egg yolks, sugar and corn-flour in a bowl until the mixture is thick and foamy. 3. Gradually pour in the hot milk, whisking constantly. Return the mixture to the pan and cook over a gentle hear, stirring all the time
4. When the custard thickens and is smooth, pour it back into the bowl. Cool it then chill.
5. By Hand: Whip the cream until it has thickened but still falls from a spoon. Fold it into the custard and pour into a plastic tub or similar freeze-proof container. Freeze for 6 hours or until firm enough to scoop, beating it twice (during the freezing process – to get smoother ice cream or else the ice cream will be icy and coarse)
By Using and Ice Cream Maker: Stir the cream into the custard and churn the mixture until thick (follow instructions on your ice cream maker)


The February 2009 challenge is hosted by Wendy of WMPE's blog and Dharm of Dad ~ Baker & Chef. We have chosen a Chocolate Valentino cake by Chef Wan; a Vanilla Ice Cream recipe from Dharm and a Vanilla Ice Cream recipe from Wendy as the challenge.

Sunday, December 28, 2008

It's a Yule Log...I swear


This month's Daring Bakers challenge was a challenge, to say the least. I had wanted to tackle a French yule log last year - the more commonly known sponge cake and buttercream variety - and failed miserably. When I saw that this month's challenge was going to be a different type of yule log full of different layers, I was excited. Something challenging and Christmas-y all in one. Yay! 

The yule log I made is comprised of six different components:

1)  Almond Dacquoise Biscuit
2)  Chocolate Mousse
3)  Chocolate Ganache Insert
4)  Praline (Crisp) Insert
5)  Vanilla Bean Creme Brulee Insert
6)  Dark Chocolate Icing

I managed to make each and every element. Other than the cream brulee, that didn't want to set up no matter how long I kept it in the oven, the remaining elements turned out as they were supposed to. And beyond that, they tasted great! Some elements I was able to make ahead of time, like the biscuit, while others had to be made just before I assembled the whole thing. 

Unfortunately, I thought that I could make the chocolate mousse component ahead of time and pop it in the fridge. Nowhere in the instructions did it say that you couldn't do this. Unfortunately, the chocolate mousse is the most import component! The mousse fills the gaps and envelops the crispy layers. Because my mousse had been sitting in the fridge for an hour or two, it was just too firm. So, when I unmolded the whole "log" after having it sit in the fridge overnight, it was quite apparent that things did not go as planned and the mousse had not spread out to become flush with the sides of the mold. It looked like some sort of crazy geological science project showing the layers of the Earth. Not exactly the look I was going for.

In any event, the log (or chunks of Earth) tasted phenomenal! It may have been one of the ugliest things I have ever made, but it tasted great and was almost like an ice cream cake. Who knew?

So, am I glad I did the challenge? Yes. Do I have plans to try it again next year? Probably not!

*****

This month's challenge is brought to us by the adventurous Hilda from Saffron and Blueberry and Marion from Il en Faut Peu Pour Etre Heureux. They have chosen a French Yule Log by Flore from Florilege Gourmand

Saturday, November 29, 2008

"Throw Your Diet out the Window" Cake


November's Daring Bakers Challenge was sugar packed, ensuring that anyone even trying to avoid the sweets would gobble this cake down without a second thought. Yes, it was that good! I devoured this like I'd never had cake before.

The challenge was Shuna Fish Lydon's Caramel Cake with Carmelized Butter Frosting. If your mouth isn't watering yet, you're obviously not human. The challenge was co-hosted by Dolores of Chronicles in Culinary Curiosity, Alex of Blondie and Brownie and Jenny of Foray Into Food.

This was SO much fun. The caramel syrup (that was used to flavor both the cake and the frosting) was crazy to make - it was like a science experiment in my very own kitchen! Although, it did make me feel bad that Steve had just scrubbed the stovetop earlier that day. Needless to say, having caramel flying and sputtering about all over the kitchen wasn't the nicest way to say "thank you." Fortunately I had a lot of mini cakes to fork over as a peace offering!

Originally, the recipe just makes one 9-inch cake. Since we really didn't have anything going on last week when I made the cake, I didn't know what we'd do with a big old cake (besides eat ourselves into a stupor). Instead, I made three 4-inch cakes (which I then stacked and frosted) and three heartshaped cakes using my mini heart springform pans. The hearts were harder to frost and I was lacking patience, so they didn't make it to the photo shoot! One of them did, however, make it downstairs to my neighbors who were celebrating 6 months of marriage, aww. Making some "baby" cakes is an easier way to spread the cake love around so you don't end up wondering what to do with the 1,000+ sweet calories sitting in your kitchen.

Overall, a really fun challenge, and a recipe that I would most definitely pull out again when I really want to woo someone with cake.

Monday, October 20, 2008

Pick a Partner


Like most TasteSpotting devotees, I sift through page after page of fabulous foody pictures and file away the favorites to make at a later date. As the dozens of new and fabulous pictures are uploaded each day, it becomes increasingly difficult to pick the best of the best to want to attempt, and I never make good on my plans to...

However, Farida's Azerbaijani Cookbook's Zebra Cake from February stuck in my head. It's so simple and yet spectacular how you can manipulate the chocolate and vanilla batters to play so well together in the pan and create a perfect pattern on par with the real thing.

Since my family and friends were visiting this weekend to go wedding dress shopping with me (and, btw, I found a FABULOUS dress!), and my dad's birthday was last week, I wanted to make a cake. However, it could not be labor intensive but still had to have some fabulousness to it. Ta-da - Zebra Cake! Something I could put together on Friday night in preparation for Saturday morning, did not need any tlc after baking, and not overly sweet.

On Friday after work my goal was to get this baby into the oven before my sister Cheryl made it to my place from the airport. Since she was already getting her luggage by the time I got home I knew I was going to have to hustle. The technique for making this cake is quite simple, and Farida has very simple step-by-step instructions. You're simply alternating between spoonfuls of the chocolate and vanilla cake batter. The batter is very runny so it just spreads perfectly with each spoonful you add.

If I'd had the perfect 3 T ladles that Farida suggests, this process would have flown by a lot faster. I, however, was usually spoons. Dripping batter everywhere (my engagement ring is still covered with it, ugh!) as I dropped in 3 spoonfulls of each per turn, I was literally racing the clock. If Cheryl had arrived 10 minutes earlier, I would have had to make her wait outside until I finished portioning out the batter. Once you start you really can stop, especially toward the end where the cake is just an endless amount of rings. I wish I had a picture of the final cake before it went into the oven, but time was tight and Steve wasn't home!

Pick a partner before you embark on this cake...one takes chocolate, the other vanilla, and you'll be done in no time! Perfect for kids too - so simple and hard to mess up.

As far as the taste...definitely good to have with coffee or tea. I would have liked it to be a little more chocolatey. I did spring for the expensive dutch-processed cocoa powder, but if I make this again I would definitely experiment with a different way to add in the chocolate. The cake is also a little bit on the dry side so I'd probably trouble shoot that as well.

Overall this was a great way to change up a run of the mill cake and I would love to play around with this again and see what other ways I could use this zebra technique! Check out Farida's blog for the recipe and instructions.

Tuesday, July 29, 2008

It's Daring...


...that I even attempted this Daring Bakers Challenge!

After continuing to see Daring Bakers challenges posted all over I decided to see what it was all about. I joined, and conveniently the first challenge fell around this time of craziness in my life - with vacation, move into the condo, etc.

Despite all of that, I trudged on and Sunday attempted the first challenge - Filbert Gateau with Praline Buttercream from Great Cakes by Carol Walter. I was all ready to bake, had my new kitchen all organized, ingredients lined up and ready to go.

Preparation only took me so far, because the baking gods weren't smiling down on me. The cake just didn't rise up the way I had expected and it was tough, uneven and thin. I'm not positive about what I did wrong, but I think it may not have been mixed as well as it should have been, so it wouldn't rise.

From the point I pulled the cake out of the oven, I knew I was doomed. I actually was ready to cut my losses and stop there, deeming myself not ready for the Daring Bakers, but Steve made me continue on. Continue on to a horrendously ugly cake that I am embarrassed to post. I even encouraged Steve to "accidentally" help the cake meet it's fate - maybe it could fall off the counter? Or one of the cats could inconveniently jump on the counter and place a paw in the middle? No dice. Steve continued with the planned photo shoot, helping to ensure I always have memories of my ugly cake.

On the upside, I've never made Swiss buttercream before, so that was a new technique learned, and it turned out fabulous! I was so proud. I will definitely use this method again as it was tasty and fun to prepare (if whipping eggwhites and sugar over a hot stove can be "fun").

So please enjoy my failed first baking adventure for my first Daring Bakers Challenge...can't wait to amp myself up for next month's challenge...and maybe buy some backup ingredients, you know, just in case...

Wednesday, June 25, 2008

Blueberries & Goodbyes

Tomorrow I'm leaving on for Italy with my family - a wonderful 10-day trip through Venice, the Chianti region of Tuscany and Florence. My mouth is already watering for all of the gelato I will consume, and I'm anxiously awaiting all of the beautiful sites and sounds. I made a whirlwind trip through Rome and Florence when I was in college, so I'm relieved that this time around I will have plenty of time to relax and really enjoy my time there. And did I mention the gelato?

On the downside, Steve will not be joining us on this trip. I know how much he would love to be there (the pictures he would take would be magnificant), and I'm going to miss having my best friend there with me! Hopefully our kitties will be keeping him company so he won't get too lonely.

This weekend I bought a massive container of blueberries for a blueberry lemon coffee cake. Everything went smoothly until I realized that the recipe was written for an 8-inch springform pan. Mine is a 9-inch. "What difference could that inch really make?" I asked myself. Apparently a big difference, because the cake ended up very thin, not puffy and beautiful as I had envisioned. However, what the cake lacked in looks, it made up for in taste. I'm not a big blueberry eater but I definitely shoveled slice after slice of this into my mouth!

I hope everyone has fabulous 4th of July holiday, I can't wait to see all of the red, white and blue bakin'! I'll be scarfing down Italian pastries and hopefully bringing some baking inspiration home with me.

Blueberry Lemon Coffee Cake
Recipe adapted by Lazy Susin from Joy of Baking
Streusel Topping:
1/3 C all purpose flour
1/3 cup granulated sugar
1/4 cup (4 T) cold unsalted butter, cut into pieces
Lemon zest

Cake Batter:
1 Call purpose flour
1 large egg
1/2 tsp pure vanilla extract
1/3 C milk
2 C fresh blueberries
1 tsp baking powder
1/8 tsp salt
1/4 C (4 T) unsalted butter, room temperature
1/2 C granulated white sugar
Zest of 1 lemon
1-2 tsp lemon juice
Preheat oven to 350 degrees F. Butter an 8-inch spring form pan and line the bottom of the pan with parchment paper. Set aside.
For streusel topping: In a large bowl, mix together the flour and sugar and lemon zest. Cut in the butter with a pastry blender or fork until it resembles coarse crumbs. Set aside while you make the cake batter.
In a separate bowl whisk together the flour, baking powder, and salt. Set aside.
In the bowl of your electric mixer, with the paddle attachment, cream the butter. Add the sugar and beat until light and fluffy. Add the egg and vanilla and beat until incorporated. Add the flour mixture, alternately with the milk, and beat only until combined. Stir in lemon juice and zest. Spread the batter into the bottom of the prepared pan, smoothing the top with an offset spatula.
Evenly arrange the blueberries on top of the cake batter and then sprinkle with the streusel topping.
Bake for about 45 - 50 minutes or until a toothpick inserted in the center of the cake comes out clean. Remove from oven and place on a wire rack to cool slightly.
Serve warm or at room temperature.

Monday, March 10, 2008

Wedding Bells

Over the weekend I made my first cake that I was "hired" to make, for a friend's cousin's bridal shower. What pressure! And with pressure...came disaster. One layer decided not to bake all the way and had to quickly be remade and replaced, another layer decided to crack as it was being positioned on top of another (thanks to the powers of buttercream, it was saved). There's a laundry list of setbacks - not enough buttercream to go around, uncooperative fondant. You name it, I experienced it.

But I finished, and at the very least, the cake was tall. And tall is good, right? And I know the cake is tasty - bottom tier of white butter cake and strawberry filling, top tier of chocolate butter cake with Oreo buttercream filling, slathered in buttercream and wrapped in mm fondant. Delicious! And, of course, topped off with a cute little gum paste bow and surrounded by fondant pearls, who can resist?

But I definitely learned not to bite off more than I can chew - the next cake will be one fabulous tier that I can perfect and make beautiful. I'll just make it an extra-tall tier for dramatic effect!

Look at my review of Wilton's Gum Paste that I used to make this bow with on Sazze.com!

Monday, January 28, 2008

Final Happy Birthday to Kookybites (& Joe!)

This weekend we had the final celebration for Steve's birthday. Our friend Joe is also celebrating a January birthday, so what better way to celebrate both than with a joint birthday cake? Steve and Joe are both photographers, hence the photography-themed cake.

I normally just make MM fondant, cover the cake, and call it a day. However, I wanted to try my hand at making a cake that was a little more fun and tackle molding people and animals out of fondant, so I bought a little box of Wilton fondant for that and stuck with the MM fondant for covering the cake. Having now worked with storebought fondant, I don't think I would choose to cover a cake with it unless I had to - the chemical smell was a bit much!

I've recently discovered a new blog of someone who is a complete fondant artist - The Journal of a Girl who Loves to Cook. Her B-Boy Cake is a great example of her ability to work with fondant at a great level of detail. My first attempt (ok, about third by the time I was done), was not quite as beautiful to look at.

But he at least looked like a person. And I was quite proud of his hair. The ad hoc leather messenger bag I made out of the leftovers was loved by everyone (hooray for last-minute additions).

The penguins came a bit easier, but again, they're not exactly works of art. But Steve loves penguins, so he was happy.


Overall, the cake was a hit with everyone at the party, but didn't receive an 'A' from my critical eye. I do feel like my craftsmanship has greatly improved - I'm getting the height I've wanted from my cakes, and am much more successful at creating a level, flat cake. And, it didn't taste too bad either - chocolate butter cake with Oreo buttercream filling (because who doesn't love Oreos?!).

Monday, January 21, 2008

Happy Birthday Kookybites...take 2


One of Steve's requests for his birthday was Chocolate & Zucchini's Orange Ginger cake. I made this a year ago (in my pre-blog days) for an office party, and held a slice back for Steve. He loved it, and has been asking for it again every since. So, to grant his birthday request, I made this on Sunday.

This cake is a process, boiling the oranges and all, but nothing too hard to tackle on a Sunday afternoon. Because you are using the entire orange in the puree - peel and all - the cake is more of a bitter orange flavor rather than light and citrus, and is balanced by the spiciness of the ginger.


I have one more cake planned - a fondant-covered monstrosity - for a party this weekend, and then we'll call Steve's birthday celebration officially over! He'd better not expect this royal treatment every year...

Sunday, December 30, 2007

Wedding Shower Test Cake


A co-worker has "hired" me to make a cake for her cousin's wedding shower in March. Eek. A whole lot of pressure, making a cake for someone I haven't met - what if I ruin her shower with a crooked, squashy cake?!

To ensure I'm up for the challenge, I made a test cake today. After completely trashing the kitchen, I emerged with this cute little package, which will accompany Steve and I to a New Year's party tomorrow. It's a butter cake with strawberry filling - nothing too crazy, but hopefully tasty. The actual cake will be similar, but will be two stacked packages, very close in size, and I think maybe two different shades of pink. The bow is made out of gum paste, and I'm pretty proud of my first bow adventure. Gum paste is amazing stuff to work with. The cake is covered with a layer of buttercream frosting and mm fondant.

This day of baking was filling with challenges - a layer that (I) broke in half and had to remake, fondant that just didn't set up the way it usually does and was a nightmare to work with, accidentally dying some frosting hot pink (which I used to write on the gift tag with). But overall, I think it's heads and shoulders above the cake I made for Darcie's shower in August, and with a few refinements I'll be ready to go in March!

Check out my review of Jet-Puffed Marshmallows on Sazze.com!

Sunday, November 4, 2007

Anyone need a cake?!


I had the chance to make some mini cakes (with 4-inch cake pans and a mini heart-shaped pan) this weekend for decorating practice. I had forgotten how much work goes into the process - whether the cake is 4 or 14-inches. Cake batter, marshmallow fondant, buttercream icing and royal icing...it was an all-day affair and a lot of work. In the end, I had fun, the pieces I made with gum paste turned out well, and I'm ready to make another cake for a special occasion.

I like this squiggle cake - not nearly as good as the example I had in a book, but a lot of fun, and the gum paste flowers look cute on top.


If I had a baby shower for someone coming up, I could totally do a larger version of this cake... (after painstakingly working on this bear for nearly an hour, I watched a youtube video where a woman showed how to make one in a matter of minutes. Who knew?!). I've never really worked with icing before, so I'm slowly learning how to work with the different tips. I'm not quite ready for flowers yet, but this border came out pretty well (for a beginner).


Now I'm ready for some real cakes. I feel like I keep on learning and learning, and have come leaps and bounds since I made the baby shower cake in August. Anyone with a party coming up who wants me to make them a cake?!

Check out my review of my heart shaped mini springform pan on Sazze.com!

Tuesday, August 28, 2007

I baked me a cake...a purty cake...

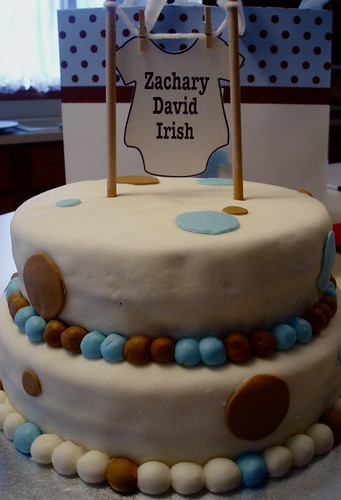
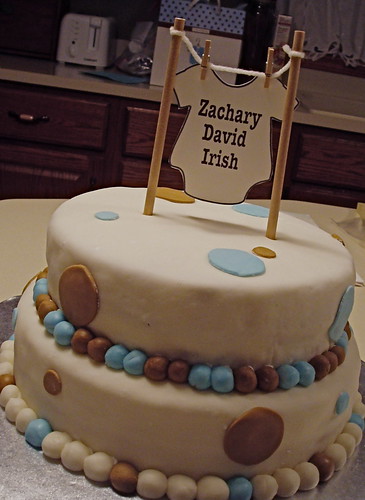
So, little Zachary's baby shower has come and gone, and I found myself all day on Friday in Washington, working on the cake. I'd forgotten how nice it was to have big counter tops, a double sink (for the mass of dirty dishes I created), and a big clean fridge. Oh, and no Daisy or Basil underfoot.

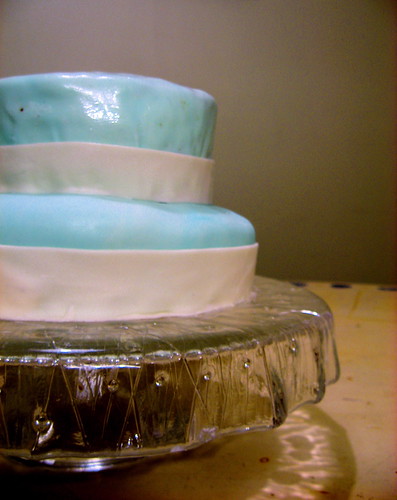
Anyway, so I made this cake. For a first go around, I feel ok about it. Definite room for improvement, but still, a vast improvement over what I've done before, and I definitely learned the fundamentals for doing a presentable cake. The bottom tier on this one is white butter cake with strawberry buttercream, and the to tier is chocolate butter cake with mint buttercream.

All-in-all, a good attempt, and hopefully in the future I'll be able to continue experimenting. Maybe by Zachary's first or second birthday I'll be able to make him a cool dinosaur or truck cake. Oh yah, and Zachary and Darcie are doing great, and he couldn't be cuter (and getting bigger by the day!!).

Sunday, July 29, 2007

Baby shower cake, take 2


Now that little Zachary Irish has been welcomed into the world, it's time to get serious on this cake so that his upcoming baby shower is glorious as he gets all kinds of great swag. My first practice cake was something ugly. It leaned. The top was bumpy. I used a cake mix. It was all kinds of horrible. This time around I did my research, purchased a copy of the Cake Bible by Rose Levy Beranbaum and baked away. I'm happy with what's currently sitting in my kitchen. The layers were solid with no air bubbles to speak of and baked up even. No big dome in the center, woo hoo! Because I had some leftover fondant I was able to decorate this, but I wasn't really going on looks here. If I can't achieve a good cake, it doesn't matter how well I can cover it with some fondant! So, I feel like I'm ready to make some cake for the shower in August, and make little Zachary proud!


Friday, July 6, 2007

Baby Shower cake....take 1

So, I'll be making a cake for a baby shower at the end of August. I started practicing this week and when finished decided I had made the world's ugliest cake. Needless to say, I was pretty upset. But I've figured out what I need to learn and how I can go from my sad ugly tilted cake to something like this beautiful cake I found on Pink Cake Boxes. Making the fondant is surprisingly easy, the hard part I've found is just getting the cakes to bake up big, nice, and somewhat even on top. I'll be making a lot of cake this month in "practice." Fortunately my neighbor has a great fondness for cakes and will welcome anything I bring down, so at least they won't go to waste!

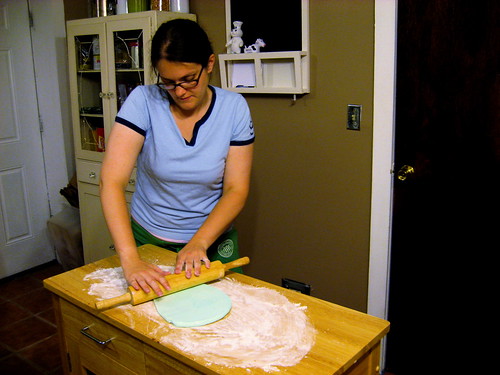
So, I started with making the fondant, with a pretty simple recipe I found that involves melting down a bag of marshmallows and mixing that goo with a bag of powdered sugar, sticky!


Once done, it's surprisingly easy to work with, add food coloring to (this can be a little tricky) and roll out...


So, while I think I've mastered the art of fondant creation and application, you can't really do much if the cake is crooked, lumpy, too small, etc etc. I definitely have some work in front of me. Sigh. It was so beautiful in my head!