Showing posts with label Cookies. Show all posts

Friday, January 30, 2009

Pregnant Woman's Dream


A co-worker asked me to make some cookies for a baby shower she's hosting this weekend, with the cookies to match the pickle and ice cream themed invitations. I was relieved that the pickles actually ended up looking like pickles! I bought a flip flop-shaped cookie cutter and it worked perfectly.

So fun working on a project like this, but I'd forgotten how time consuming this can be -especially when I'm decorating on weeknights! I can definitely use a break from royal icing for awhile :)

Monday, January 19, 2009

Chocolate Peppermint Pinwheels


Hello baking blog, I've missed you.

It seems like time in the new year has been passing me by and I haven't had time to set foot in the kitchen to get any baking done. Fortunately I have a back log of baking goodness from December, I just...well...have to blog everything!

During the holidays I was watching the Food Network special on holiday cookies, where all of my favorite (and not so favorite) Food Network personalities shared their favorite holiday cookies. Alton Brown (along with Santa!) made these chocolate and peppermint pinwheel cookies, and the process was so simple. Sugar cookie dough. Crushed up candy canes. Peppermint extract. Chocolate. Easy peasy!

Oh Alton Brown, I'm a little disappointed in you (but I still love you!!). Why did you tell me to only refrigerate the dough for 5 minutes before I rolled it?! A sticky, sticky mess. But once I soldiered through it and got everything rolled, the process was a cinch and the cookies were fabulous. I'm definitely putting these on the list for next year - in theory, a cookie easy to make and quick to impress.

Chocolate Peppermint Pinwheels
Recipe from Food Network

1 batch Sugar Cookies, recipe follows
3 ounces unsweetened chocolate, melted
1 teaspoon vanilla extract
1 egg yolk
1 teaspoon peppermint extract
1/2 cup crushed candy canes or peppermint candies

Divide the dough in half and add chocolate and vanilla to 1 half and incorporate with hands. Add egg yolk, peppermint extract, and crushed candy to other half of dough and incorporate with hands.
Cover both with plastic and chill for approximately 5 minutes (note: I would refrigerate longer until dough is firm). Roll out doughs separately to approximately 1/4-inch thickness. Place peppermint dough on top of chocolate and press together around the edges.
Using waxed paper or flexible cutting board underneath, roll dough into log. Wrap in waxed paper and refrigerate for 2 hours.
Preheat oven to 375 degrees F. Remove dough from the refrigerator and cut into 1/2-inch slices. Place cookies 1-inch apart on greased baking sheet, parchment, or silicone baking mat and bake for 12 to 13 minutes, rotating the pan halfway through cooking time.
Remove from oven and let sit on baking sheet for 2 minutes, then move to a wire rack to cool completely. Store in an airtight container for up to 1 week.

Sugar Cookie Recipe:
3 cups all-purpose flour
3/4 teaspoon baking powder
1/4 teaspoon salt
1 cup unsalted butter, softened
1 cup sugar 1 egg, beaten
1 tablespoon milk
Powdered sugar, for rolling out dough

Sift together flour, baking powder, and salt. Set aside. Place butter and sugar in large bowl of electric stand mixer and beat until light in color. Add egg and milk and beat to combine. Put mixer on low speed, gradually add flour, and beat until mixture pulls away from the side of the bowl.

Friday, January 2, 2009

On Following Martha...

I have a bit of a love-hate relationship with Martha Stewart. I think I'm probably not alone in this statement - I feel I can safely assume that there are many out there who feel the same. I'd love to just magically be dropped into a world where I have hours to entertain and hand make each and every element at the table, from hand embroidered linens to perfectly lettered table cards. On the flip side, Martha Stewart Weddings is probably the most accessible wedding magazine out there that I've bought (and trust me, I've checked 'em all out!). Every issue is full of great ideas that - shocker - someone like me can actually accomplish!

So, when it comes to Martha, I take her ideas with a grain of salt and keep my expectations low. But when it comes with cookies, I feel like it's pretty easy to judge on the spot what may or may not work out. When it came to Martha's Outrageous Chocolate Cookies, I figured I wouldn't come up against too many obstacles...I mean, they're drop cookies!

Oh Martha, why would you not have me refrigerate the dough? Please tell me, how did you tackle spooning the big gooey mess that was this dough onto your lined cookie sheets?! I don't know about you, but I was simply covered in dough (and ok, I'll admit, not the worst thing in the world, it was delicious!). Unfortunately, the struggle to get the first batch onto the cookie sheet was definitely not worth the trouble. They never puffed up and definitely did not get all crackly in the center (the "high sign" that they were ready to come out of the oven). Hence, I ended up with 6 flat, burnt chocolate cookies.

Seeing the struggle with the first batch I stuck the remaining dough in the refrigerator for about 15 minutes, letting it firm up. The gooey batter was so much easier to manage and the cookies actually baked up correctly - crazy, huh?! They got crackly, shiny, firm around the edges. Absolutely perfect. All-in-all, the cookies ended up great and they were definitely outrageous - outrageously awful if you followed Martha's instructions, and outrageously chocolatey if you follow your instincts! (sorry, Martha)

Martha Stewart's Outrageous Chocolate Cookies
Recipe by Martha Stewart

8 ounces semisweet chocolate, roughly chopped
4 tablespoons unsalted butter
2/3 cup all-purpose flour, spooned and leveled
1/2 teaspoon baking powder
1/2 teaspoon salt
2 large eggs
3/4 cup packed light-brown sugar
1 teaspoon vanilla extract
1 package (12 ounces) semisweet chocolate chunks

Preheat oven to 350 degrees. Heat chopped chocolate and butter in a microwave-safe bowl in 20-second increments, stirring in between, until almost melted; do not overheat.
In another bowl, whisk together flour, baking powder, and salt. In a mixing bowl, beat eggs, brown sugar, and vanilla on high speed until light and fluffy.
Reduce speed to low; beat in melted chocolate. Mix in flour mixture until just combined. Stir in chocolate chunks.
Drop heaping tablespoons of dough 2 to 3 inches apart onto baking sheets (or, refrigerate for 15 minutes beforehand, as I did).
Bake, rotating sheets halfway through, until cookies are shiny and crackly yet soft in centers, 12 to 15 minutes. Cool on sheets 10 minutes; with a thin metal spatula, transfer to racks to cool completely.

Monday, December 22, 2008

Peppermint Pretties


I decided last week that I really needed to get myself into the holiday spirit. With Thankgiving being so late, they didn't really give us a whole lot of time to prepare ourselves for the onslaught of holiday festivities. This year is really quite lax for Steve and I, as we just bought our condo, new furniture, and are planning our wedding, so buying piles of presents wasn't really on the agenda. Fortunately we've both been able to do all of our shopping online (thank you, work, for letting me have box after box sent to me at the office!) and stayed away from the madness...but that means we've also stayed a little bit removed from the whole holiday thing.

Joy the Baker really inspired me to make her Peppermint Meringues. Each one just looks so precious, and with the primary ingredients being sugar and eggs, who could really mess this one up? So I thought, anyway.

I've never had meringue cookies before, so I didn't really know what to expect from start to finish, although Joy's instructions were quite straightforward. Obviously the "wow" factor for these is how she painted the inside of her pastry bag so that when the meringues are piped out, they're striped with color. Easy enough.

I think I must have had a combination of the wrong size of star tip that I used to pipe these out with, and maybe meringue that wasn't quite stiff enough, because mind ended up looking more like chocolate kisses and less like cute little stars. Also, the first half that I piped bore almost not color at all, so by the time the color was really pulling through, the bag was almost empty! I had ok luck with refilling the bag, but wow this stuff gets messy! Definitely a one shot deal in my book.

So how did they taste, you ask? Quite minty! And airy. I'm not a crazy-for-mint person, but these were delicious and light on the tongue. And oh, how good would these be to accompany a mocha or hot chocolate?!

It's hard to believe the Christmas countdown is here...time to get wrapping...and hang some decorations (wherever they might be, hmm)!

Monday, November 10, 2008

Black & White...and Sweet All Over


A little market in our old neighborhood always had black and white cookies...all individually packaged and just waiting for us to buy one. When we felt super indulgent we'd pick one up and then race home to gobble it down, passing it back and forth until the last black and white bite was gone.

Since we've moved, we don't have an outlet for these cakey cookies. I mean, Starbucks sells the little packs of mini black and whites, but I'd rather have 'em fresh. These have been on my list for ages to make but I've always avoided attempting it because I thought it would be a big, sticky mess.

My oh my, how wrong I was! These were sooo easy to decorate. The frosting sets up enough that it's pretty easy to keep a clean center line, and using a pastry brush makes it a super simple process. My only regret is that I made a smaller batch of frosting than I should have, so I didn't "paint" these quite as thick as I would have liked to. Didn't want to end up with any naked cookies!

I had randomly searched around for a recipe online, and ended up using a cookie recipe from one site, and a frosting recipe from another. The cookies weren't quite as "cakey" as I would have liked, so I'll probably try another recipe the next time around. I also did these as minis, and used a spoon to portion out the dough. Well, more like batter. It's really quite runny, so I reccomended using a large pastry bag and piping out your cookies. Not only will this make the process go much smoother, but you'll probably end up with more uniform circles.

Black & White Cookies
Cookie Ingredients
1 C unsalted butter
1 3/4 C white sugar
4 eggs
1 C milk
1/2 tsp vanilla extract
1/4 tsp lemon extract
2 1/2 C cake flour
2 1/2 C all-purpose flour
1 tsp baking powder
1/2 tsp salt

Preheat oven to 375 degrees F (190 degrees C). Line two baking sheets.
In a medium bowl, cream together butter and sugar until smooth. Beat in eggs one at a time, then stir in the milk, vanilla, and lemon extract. Combine cake flour and all-purpose flour, baking powder, and salt; gradually blend into the creamed mixture. Drop tablespoonfuls of the dough 2 inches apart on prepared baking sheets or use pastry bag to pipe the dough.
Bake until edges begin to brown, about 20 to 30 minutes. Cool completely.


Icing Ingredients
1 1/2 C confectioners sugar
1 T light corn syrup
2 tsp fresh lemon juice
1/4 tsp vanilla
1 to 2 T water
1/4 cup unsweetened Dutch-process cocoa powder


Make icings while cookies chill:
Stir together confectioners sugar, corn syrup, lemon juice, vanilla, and 1 tablespoon water in a small bowl until smooth. Transfer half of icing to another bowl and stir in cocoa, adding more water, 1/2 teaspoon at a time, to thin to same consistency as white icing.
Ice cookies:
Turn cookies flat sides up, then spread white icing over half of each and chocolate over other half using a pastry brush.

Thursday, October 16, 2008

Can't get enough of the stuff...

We're peanut butter people in our house (creamy, not chunky please, and to be more specific, Whole Foods 365 Creamy Organic Peanutbutter). I can't recall ever fiending for peanut butter sandwiches as a kid, but they're definitely a staple in my life now. Every morning at work I mentally count down until I can allow myself to bust out the sandwich...I usually don't make it past 10am before the sandwich is gone. Yes, I've realized that I have no self control. I even cut it into 3 even pieces in a sad attempt to make the highlight of my lunch for as long as possible.

Since we've also been on an oatmeal chocolate chip cookie kick this year as well, and we'd already tried every other combination with peanutbutter (adding it to the batter, gluttonously smearing it on top of oatmeal chocolate chips fresh outta the oven), we decided to do a little reversal. Oatmeal peanutbutter cookies drizzled with chocolate? Niiice. Compared to their chewier counterparts with the chocolate chips, these were a little bit on the crispier side. Delicious and giving the perfect chocolate-peanutbutter combination, I wish I could exchange a handful of these for my peanutbutter on whole wheat any day of the week.

Peanut-Boatmeal Chocolate Drizzle Cookies
Recipe by Lazy Susin

1 C all purpose flour
1 tsp baking powder
1/2 tsp baking soda
1/2 tsp salt
1/2 C butter, room temperature
1/2 C peanut butter
1/2 C white sugar
1/2 C brown sugar
1 large egg
1/2 tsp vanilla extract
2 C quick cooking oats
1/2 cup chocolate chips, melted

Preheat oven to 350F and line a baking sheet with parchment paper.
In a medium bowl, whisk together flour, baking powder, baking soda, salt.
In a large bowl, cream together the butter and the sugars. Beat in the egg, followed by the the vanilla extract and the peanut butter.
Working by hand, stir in the flour mixture and the oats until just combined and no streaks of flour remain. Use hands to portion out and shape the cookies (somewhere between 1/4 - 1/8 of a cup). Flatten the cookies slightly.
Bake for about 10-12 min. Cookies will be light brown at the edges when done.
Let cool on sheet for 3 or 4 minutes and drizzle with the melted chocolate, then transfer to a wire rack to cool completely.
Makes about 2 dozen cookies, depending on the size.


Check out my review of Jiff peanut butter on Sazze.com!

Thursday, September 11, 2008

Just a Pinch of Salt

I've never been a huge fan of chocolate chip cookies. I mean, I like them and I'll eat them, no need to twist my arm there. But love them, crave them, absolutely have to have them? I've never quite been there.

Until, that is, I discovered Baking Bites' Chewy Chocolate Chip Cookies. No matter what I do they bake up into perfectly round, couldn't have shaped them better if I tried, discs of wonderfulness. The ratio of brown sugar is just enough to pull through a delightful caramel flavor. And, to take these lovelies just one step further...sprinkling a pinch of sea salt on top pre-baking, just enough to create a salty-sweet combo that can't be beat.

Chewy, salty, sweety, chocolatey...perfect. I've discovered a new love, and a recipe that can support me with as many varieties as I want to throw at it...white chocolate chips? Dried cranberries? Walnuts? The opportunities are endless, the calories are inevitable!

Monday, July 28, 2008

Moving Day Bliss

Moving generally isn't associated with "bliss" ... but despite the torrential rainstorm we endured while moving out of our apartment last weekend, nothing could have been more blissful than moving into our new condo! Steve and I took the leap into home ownership, and after months of planning and a week of painting we were finally able to move into our new digs.

To help ease the pain for everyone else (as they were not nearly as excited about our new condo, why should they be? They were "voluntarily" lugging boxes in the rain), I said farewell to my much-hated apartment kitchen with one final bake off. Amidst all of the boxes, half-packed ingredients and with cookie sheets strategically balanced on the garbage can, microwave and over the sink, I was able to help our friends feed their faces with some of the BEST chocolate chip cookies I've ever made (and tasted!), a batch of Ginger Chewies, and mini chocolate chip muffins.

Now we've unpacked the last box, have pictures on the wall and yesterday I was finally able to bake for the first time in the new, beloved kitchen. So much counter space! An oven that isn't sitting unevenly on the floor! A garbage disposal! I had forgotten such wonders existed. I hope to post some pictures this week of the new and fabulous kitchen as well as some baking adventures in the new place.

Thursday, June 19, 2008

Ginger Chewies


I've been using my copy of Elinor Klivans' Big Fat Cookies a lot lately. Other than a past chocolate chip cookie disaster I had with one of her recipes, everything else has been smooth sailing.

About every six weeks I have an all-day meeting at work that I have to arrange lunch for. I always make sure that we don't order dessert and I bring something in. The group in the meeting, however, is on a continual health kick, so they don't go in very much for the sweets...so from the meeting the remaining cookies get parked by the coffee pot, and are gone in an instant.

I'm convinced people are taking handfuls at a time for them to disappear that fast...but with the deliciousness of these Chewy Ginger Cookies, I wouldn't be surprised. They're absolutely perfect in taste and texture. I made mine smaller than Klivans' suggestion of 1/4 C of dough per cookie to get more out of them, and I think they would be fabulous if done in small bite-sized form. This is a recipe that I think will see many repeat performances in my kitchen!

Chewy Ginger Cookies
From Elinor Klivans' Big Fat Cookies
2 ¼ cups unbleached all purpose flour
2 tsp baking soda
¼ tsp salt
1 tsp ground cinnamon
1 tsp ground ginger
½ tsp cloves
¾ cup (1 ½ sticks) unsalted butter, softened
1 cup packed light brown sugar
1 large egg
¼ cup molasses
about ¼ cup granulated sugar
Position a rack in the middle of the oven. Preheat the oven to 350°. Line two baking sheets with parchment paper.
Sift the flour, baking soda, salt, cinnamon, ginger and cloves into a medium bowl and set aside. In a large bowl, using an electric mixer on medium speed, beat the butter and brown sugar until smoothly blended, about 1 minute. Stop the mixer and scrape the sides of the bowl as needed during mixing.
Add the egg and molasses and mix until blended and an even light brown color, about 1 minute. On low speed, add the flour mixture, mixing until incorporated.
Spread the granulated sugar on a large piece of wax or parchment paper. Roll ¼ cup of dough (more or less depending on size of cookie desired) between the palms of your hands into a 2 inch ball, roll the ball in the sugar and place on one of the prepared baking sheets. Continue making cookies, spacing them 2 inches apart.
Bake the cookies one sheet at a time until the tops feel firm, but they are still soft in the center and there are several large cracks on top, about 14 minutes. Cool the cookies on the baking sheets for 5 minutes, then use a wide metal spatula to transfer the cookies to a wire rack to cool completely.
Makes 9-12 cookies (more if making small cookies than suggested).

Check out my review of Elinor Klivans' Big Fat Cookies on Sazze.com.

Friday, May 23, 2008

K-I-S-S-I-N-G!

You know the rhyme - "Laura and Steve, sitting in a tree, K-I-S-S-I-N-G! First comes love, then comes marriage, then comes baby in a baby carriage..."

Today at work we a had a little of both (except for the kissing in trees part) - my boss is getting married next weekend and another member of our department has a little one very close on the way, so we has a surprise shower for both of them. Being the Friday before a holiday we ended up having a lot of people out of the office, but it ended up being a great celebration and chance for everyone to relax a bit on a Friday afternoon. Both ladies were surprised by the shower, and we have a very well-rounded and delicious potluck lunch.


As party planner I nabbed desserts for my contribution and made some little onesie cookies and wedding cake cookies. I forget how time consuming these can be, so I'll definitely only be "whipping" these up for special occasions.

A great way to end the week, now I'm ready for the 3-day weekend to begin!

Thursday, May 22, 2008

Peanut Butter Bliss


All winter long, Steve and I have "treated" ourselves with one version or another of Baking Bites' Low Fat Oatmeal Chocolate Chip Cookies. It's a great snack that we can feel slightly less guilty about, with its minimal use of butter, but it still feels like we're indulging in something that's really bad for us.

We started off making individual cookies and eventually transitioned into throwing the dough into an 8x8-inch baking pan and making cookie bars, allowing for quicker access to the good stuff. No time spent lining baking sheets with parchment paper or portioning out the dough, just straight into the pan and into the oven.

One night we were making peanutbutter sandwiches for work the next day (yes, we do this everyevening!), and we were snacking on cookies bars at the same time. It didn't take long to put the two together...soon we were spreading peanut butter all over the cookie bars - the treat almost seemed sinful!

To recreate this dangerously good combination, we now add a 1/4 cup of peanutbutter straight into the dough and the peanutbutter flavor really shines through. Although, don't be afraid to grab that jar of peanut butter and smear a little more on top...

Sunday, May 18, 2008

Cherry, Chocolate & Almond Cookies


I'm not usually a big fan of making chocolate chip cookies - don't get me wrong, I love to eat them, but making them? It seems like there are so many other recipes to try, I usually don't touch on this classic.

Steve wanted me to do something with chocolate chips and almonds so we found Baking Bites' Chocolate Chip and Almond Cookies - a great recipe from a few years back. I can't resist cherries, chocolate and almonds, so we chopped up some dried cherries and added those to the batter as well.

These baked up golden brown and delicious, and I'll definitely be using versions of this recipe in the future - whenever I decide I need to get back to the classics.

Sunday, May 11, 2008

Lemony Gingerness

I haven't sent any baked goods to work with Steve recently, so hopefully they will enjoy seeing some cookies in the office tomorrow morning.

I've worked out of Elinor Klivans' Big Fat Cookies before with mixed results. Her Butterscotch Marble Blondies I blogged earlier this winter were tasty and easy to replicate. But I had some messy results with her Chocolate-Chip Stuffed cookies, where a mound of chocolate chips were sandwiched between chocolate chip cookie dough, to bake up with gooey chocolate in the center. Against my better judgement I followed her recipe exactly and did not refrigerate the dough, so it was way too sticky to work with and the cookies were flat, sad  pancakes (on the upside, the dough was phenomenal). 

So, with a little bit of hesitation I pulled out 
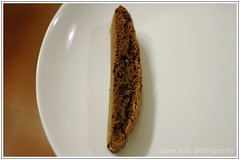
Big Fat Cookies again today to make Lemon-Ginger Cookie Sandwiches. The dough was incredibly easy to work with and everything was perfect from start to finish. I was able to find every single ingredient in my pantry, but was still able to make a fabulous cookie with unique flavors. 

Lemon-Ginger Cookie Sandwiches
from Elinor Klivans' Big Fat Cookies
Cookie
2 C unbleached all-purpose flour
1/2 tsp salt
2 1/2 tsp ground ginger
1 tsp ground cinnamon
1 C unsalted butter, room temperature
1 C powdered sugar
2 tsp finely grated lemon zest
1 tsp vanilla extract
1 C (4 oz) whole blanched almonds, toasted and finely ground
Filling
1/2 C unsalted butter, room temperature
1 1/2 C powdered sugar
2 tsp finely grated lemon zest
1 T fresh lemon juice
Sift the flower, salt, ginger and cinnamon into a bowl. In a large bowl, beat the butter and powdered sugar in a mixer until smooth. On low speed, mix in lemon zest, vanilla, almonds. Mix in the flour mixture until the flour is incorporated and the dough holds together and away from the side of the bowl.
Divide the dough in half and form two 6-inch disks. Wrap each one in plastic wrap and refrigerate the dough until it is cold and firm enough to roll, about 40 minutes.
Preheat the over to 325 degrees F. Line baking sheets with parchment paper. Unwrap one piece of dough. Flour the rolling surface and roll out dough about 1/4 inch thick. Use a round cookie cutter with scalloped edges, 3 1/4 to 3 1/2-inch circles or smaller, depending on how many cookies you want. Unwrap the other piece of dough and cut out remaining cookies, to have an even number. Cut a circle or other shape from the center of half of the cookies.
Bake the cookies, one sheet at a time, until the edges are light brown and tops firm, about 20 minutes. Cool the cookies for 5 minutes on the baking sheets, then transfer to cooling racks.
In a medium bowl, using an electric mixer on medium speed, beat the butter, powdered sugar, lemon zest and lemon juice until smooth. Spread the frosting onto those that do not have the holes in the center and make sandwiches with those that do have holes.
Store  in a tightly covered container in the refrigerator for up to 4 days.
*Makes 9 cookie sandwiches with 3 1/2-inch circle cookies, makes 15 cookie sandwiches with 2 1/2-inch circle cookies.

Sunday, May 4, 2008

May Flowers...


With May flowers in tow, I return to blogging after a month-long hiatus. Between a crazy-busy month at work, trying to nail down the reception site for my wedding and condo-hunting with Steve, I had to stay far, far away from the kitchen.

Soon the reception will be booked and I'll officially have "the date" and we've now successfully negotiated for our first home. Done and done. Now I can direct my energy back into baking and prepare for the many baking projects I'll have ahead of me in the new condo, where I'll have beautiful black granite countertops and plenty of counter and cabinet space - I can't wait!

Hopefully we've made our way through all of the April showers and can enjoy the great weather to come...in the meantime, I'll enjoy these delicious sugar cookies with lemon royal icing.

Sunday, March 9, 2008

International Women's Day...Smile!

International Women's Day was yesterday, so I have belatedly made some bright n yellow smiley face cookies. Simple sugar cookie dough, dyed yellow, decorated with chocolate smiley faces. Just cute enough to make you smile, too. With making a cake yesterday for a bridal shower (to be blogged later) I've just barely made the cutoff for the International Women's Day roundup.

Thursday, February 14, 2008

I <3 ...

Valentine's Day has to be one of my most favorite holidays (even though up until last year I was always without a Valentine), I love all of the pink and hearts, and I do believe that if you just stick a heart on anything, it will automatically be cute.

With that said, I had so much fun last night decorating cookies. One of my goals this year was to learn how to really decorate cookies and make them beautiful. I had read about "flooding" cookies with royal icing, and held out until Valentine's Day to give it a try. I used the royal icing recipe from Joy of Baking and learned the technique from What's Cooking America (also my go-to for MM Fondant). The process was just about what I had expected - piping on whatever designs I wanted, letting them dry for about 5 minutes, then "flooding" the surface with royal icing that was made to a thinner consistency and put into a squeeze bottle. I think the hardest part was getting the right consistency to make sure the icing was thin enough to really spread well, and because the outer color contrasted from the inner color I had to be careful not to let the pinks and reds flood OVER the white outline.

I hope everyone is having a wonderful Valentine's Day, and I'm looking forward to spending a quiet evening at home making dinner with Steve and watching Lost, what a perfect evening :)


(I just read about the Heart for Your Valentine blog event [thanks Rah Cha Chow] so I'm going to submit...yay!)

Thursday, January 17, 2008

Butterscotch Marble Blondie Drops

Taking every advantage of opportunities to bake, I decided to make some cookies for a meeting today. My workplace cannot has the inability to function without food during meetings, so lunch is always catered in if the meeting gets anywhere near the 12 o'clock hour. Why pay for cookies if I can bring them in...thus satisfying my baking obsession without being stuck with 2 dozen cookies at home, taunting me.

For Christmas I received Big Fat Cookies, which I love. These cookies are perfect for meetings, to ensure that whatever I bring in can stand up to the jumbo-sized cookies we would otherwise order. Fast and easy, this recipe turned out to be a great weeknight baking project - the dough didn't need to be chilled and the chocolated swirled in perfectly. The recipe claims you'll get 2 dozen out of this, but I got about 15 and I felt like I did a (fairly) good job of measuring these out. The dough is pretty sticky though, so there's only so much you can do to get 3 even tablespoons-worth of dough per cookie.

Butterscotch Marble Blondie Drops
from Elinor Klivans' Big Fat Cookies
4 ounce semisweet chocolate, chopped
2 C unbleached all-purpose flour
1 tsp baking powder
1/4 tsp salt
1 C unsalted butter, softened
2 C packed light brown sugar
2 tsp vanilla extract
3 large eggs
Melt chocolate in a double boiler until melted and smooth. Set aside.
Sift flour, baking powder, and salt into a medium bowl and set aside. Beat together the butter, brown sugar, and vanilla until smoothly blended, about 1 minute. Add the eggs and mix until blended.
On low speed, add the flour mixture and mix until incorporated.
Drop heaping tablespoons (about 3 level tablespoons each) of dough 3 inches apart onto parchment-lined baking sheets. Drizzle about 1/2 tsp of the melted chocolate over the top of each cookie. Use a small, sharp knife to gently swirl the chocolate through the cookie to marbleize.
Bake the cookies in a 350-degree oven until edges are brown, about 11 minutes. The tops will still be a little soft. Let cool on baking sheet for 10 minutes, then use a spatula to transfer to a wire rack to continue cooling.
*Note: The chocolate had hardened up quite a bit by the time I was ready to drizzle over the second cookie sheet, so I had to reheat. I would probably wait and melt the chocolate after making the dough, not beforehand.

Sunday, December 9, 2007

Gingerbread Love <3


In the spirit of both the holidays and competition, I decided to make up some gingerbread cookies this weekend. Baking Bites is having a gingerbread cookie contest, so a perfect excuse for baking. I had imagined a line of cute little gingerbread boys with gingerbread girls, a little boy (ginger) boy meets (ginger) girl story. Unfortunately, I learned the hard way that gingerbread boys and girls have no torso! And with no torso, it becomes difficult to "dress" them. So, I'm not thrilled with the end result...but I did learn that I'm totally ready for Valentine's Day - my hearts were adorable, if I do say so myself.


I had only baked up half the dough on Friday, so today I made up the rest - trees, candy canes, and circles. I like how these turned out... I spent a long time finding the best way to pipe snowflakes (there were a lot of uglies in the group!). The icing I was using was a little runnier than I would have liked, so I lost a little on the detail. I don't know if these will win any awards, but any excuse to make up some Christmas cookies is ok by me!


Monday, November 26, 2007

Nutella Bliss


I love Nutella for any occasion. For breakfast? Wonderful. Lunch? Fabulous. You can't beat it. It reminds me of a my first trip to Europe, when I left feeling so sophisticated that I knew about this great treat. In biscotti Nutella shines just a brightly.
I was a little surprised I ended up with any cookies, because I ate far too much of the dough. Judging by the way my coworkers gobbled these treats down, they love Nutella just as much as I do. Thank you to Baking Bites for yet another great recipe.

Check out my Nutella review on Sazze.com!

Tuesday, November 13, 2007

Mmmm for Oreos...kind of

Who doesn't love a delicious homemade "Oreo" of sorts, two thin but rich chocolate cookies with white chocolate ganache sandwiched in the middle? Thanks to Dessert First for posting this recipe. Amazingly my co-workers didn't gobble these up (I blame it on the Halloween candy that is still lingering in our office and the open bag of caramel corn competing for attention) ... I wasn't too upset to have a few extras to bring back home.